thehuntingspecialist.com

Tuesday, July 26, 2011

Reading Whitetail Body Language After The Shot

Once upon a time, I read an article in a hunting magazine about making sure your deer is hit where you think it is, before you trot off through the woods tracking it. A couple of events from the author's bowhunting experience had demonstrated that the ol' eyeball can fool you into thinking the hit landed somewhere other than where it did.
Several times, the author suggested noting the deer's "body language" at the time of the hit, to help determine where it was hit... but he didn't give any examples or try to educate his readers on what to look for.
Thinking about it, I've rarely (if ever) seen tips in print to help hunters determine where they hit their deer via its actions. So, here goes!
The ultimate hit puts a deer down immediately, leaving no guesswork about whether or not to start tracking now or later. Most of the deer I've shot have dropped where they stood, or have fallen and died within eyesight. This isn't always the case, so it's nice to be able to have an idea where you hit your critter. This is sometimes crucial, as a poorly hit deer can run for miles if pushed too hard by trackers bent on its recovery, and may be lost in the process.
Gutshot deer will usually "hump up;" they'll arch their back, and do a sort of a stiff-legged trot.
I heard this from someone years ago, and found it to be true early in my hunting career when I failed to "pick a spot" to aim at, and instead shot at the entire deer... never a good idea, and a mistake I strive to avoid repeating. In my case, the deer went only about 75 yards or so and stopped, at which time I shot him again and he fell dead.
Had it come to tracking him, I would have known to wait before tracking, since the arched back and stiff-legged gait told me where I'd hit him. A gutshot deer can often live for a long time before dying, and if pushed by trackers may easily be lost.
Deer hit through the lungs will often kick their heels like a mule. I've seen it, and I'll swear to it.
The first time I saw this happen was on a muzzleloader hunt, years ago. When I shot the six-point buck broadside through both lungs, he kicked his heels straight back and started running. The thick woods prevented me from seeing very much of the deer as it fled, but it appeared to be slowing as it left my view.
I later found that it had run about sixty-five yards before stopping in front of my Dad, who was about to shoot it again when the buck fell, my .45 caliber maxi-ball having done its job.
Another instance of this occurred in the Ocala National Forest. When I shot that buck through the lungs, he kicked his heels up so high, I thought he was going to do a somersault. He crashed through the brush for 50 yards or so, then died.
Lung-shot deer won't always kick their heels, but in my experience they will always run before they die, and they may even run away "flag up" (see below). They usually don't travel far before dying quickly, and can usually be recovered within the hour.
Busting a Myth
There is a campfire myth that says if you shoot at a deer and the deer runs away "flag up" (with its tail held up high), then you missed the deer.This is not true! On more than one occasion, I have known well-hit deer to run away with flag up at the shot, looking for all the world as if they are perfectly healthy.
A couple examples: One deer was hit a quartering shot through the lungs with a 44 magnum, and another was shot broadside through both lungs with a 308 Win. Both deer ran away immediately with tails held high, and both died soon thereafter. One of them ran about 80 yards, and the other went 150 or more, down a steep hillside. Each was blood-trailed and recovered, though at first we thought we may have missed the deer... and these are not the only instances of this that I've seen.
So next time you shoot at a deer and it runs away with its long white tail waving good-bye, follow up and search for blood, and for your deer.
Which Way Did he Go?
A hit deer that runs without any jumping or bucking or other acrobatics will usually run in the direction it was facing when the shot was fired, even if that means running uphill. This is not always the case, though.
I once shot a whitetail doe broadside with a good heart/lung shot, and she turned and ran away, turning to the left as she went. I found no blood within the first 20 yards or so, but I eventually found a good blood trail and recovered her without much trouble. So be sure to always follow up and look for blood, no matter what the deer did when you fired.
Heart Shots
I have never aimed specifically for a deer's heart; in my opinion, it's too small and too low a target to count on. I have been told that a heart-shot deer will sometimes rear up on its hind legs, but I know they'll often just drop or run, as well, giving no indication of a hit, and sometimes not even bleeding.
Most deer shot through the heart won't go far, and will die quickly.
Take Care!
Whatever the case, be sure of the shot before you take it. Don't take a shot you don't think you can make. When you shoot at a deer, follow through and find it if you hit it, and take it home! Give it a couple of hours if you're not sure of the hit, or if you know it was a poor hit, and then track it down. Take a buddy or two with you to help out... having more eyeballs out there can often make a big difference. Don't give up, and pray often for guidance. It's always worked for me!

Navigation


The ability to use a map and compass competently is one of the basic skills of bushwalking. Navigation skills allow you to explore new places yourself without the need to be shown them by others who are more familiar with them. Being able to navigate also means you will be able to extricate yourself from a region you thought you knew but now somehow find yourself disorientated in. Being able to read a map and translate this information to your surroundings in the field also means you can plan new and interesting bushwalks in the comfort of your own home before embarking on the real thing. Being able to navigate competently increases greatly the enjoyment of travelling through the bush.
The following ideas have been gleaned from the sport of orienteering which, by its very nature, has radically improved the efficiency of general bush navigation. The over-riding philosophy is not to rely heavily on accurate bearings but instead become aware of your surroundings both real and on the map. Navigation involves relating the two through keen observation, and keeping your position on the map continually up-dated in your mind as you make progress. The basic concepts of this approach are as follows:
1. Route finding is a mental operation involving negative feedback where information is supplied by your awareness of the surroundings to continually correct your course. One way of looking at route finding is to assume you are always drifting off course. Employ frequent navigational checks to correct this error (the negative feedback aspect) so that the error does not compound itself. The more frequent these navigation checks occur, the closer you will keep to your intended route. Too many checks will, of course, slow you down unnecessarily so, if you are aiming to be competitive, a workable compromise must be reached.
2. Attack points are features that are close to but much easier to locate than the place you are heading for. An attack point could be a track or stream junction, a rock outcrop, a saddle, a peak or any other prominent feature on the map near to and on the way to your desired destination. Locating this feature first is much easier than trying to head directly to your destination especially if it is, say, a small feature hidden in bushes. Once at the attack point, the distance to your real destination will be quite short and the feature will be easy to locate with an accurate compass bearing or other simple navigating technique.
3. Collecting features are large features that you must pass en route to your destination. Note them before embarking on the next leg of your route and mentally tick them off as you pass by. Collecting features include peaks, tracks, creeks, vegetation changes and any other large feature that can be easily seen or noticed. Passing an expected collecting feature confirms you are still on route. A collecting feature that is also a point feature near your destination becomes an attack point.
4. Often you will notice a prominent feature on the map that is beyond your intended goal. These too have their use even though you do not plan to walk that far. Arriving at this feature, called a catching feature, immediately implies you have overshot the mark. Having been so caught, it is a simple matter to return the short distance to your destination. This is much better than aimlessly proceeding in the hope that you are still on track. Knowing there is a catching feature somewhere up ahead also means you can proceed with some speed towards your destination confidently knowing that if you go too far you will be "caught in the net" by the catching feature.
5. Handrails are long linear features that run in the general direction in which you wish to travel. Because they are usually easy to follow, navigation becomes simple. Handrails include such line features as tracks, fence lines, streambeds, ridges and other prominent features of great length. These may not lie exactly on your course but it is often advantageous to deviate to a handrail to facilitate navigation and sometimes, in the case of tracks, ease of walking.
6. The previous ideas can be combined with a very useful technique known as aiming-off. Gone are the days of carefully logging your position and course across a featureless landscape in order to arrive exactly at your destination. Instead, your walk can be made in much quicker time and with greater ease from the very outset by deliberately choosing the wrong bearing! Aiming-off involves studying the map in the vicinity of your destination and checking for handrails which, if followed, would lead close to your destination.
As an example, suppose your destination is a hut located beside a stream. If the stream crosses your path roughly at right-angles, being a line feature, it will certainly be a lot easier to navigate to it rather than attempting to aim directly towards the hut which is essentially a point feature. As such, the stream is acting as a catching feature. If you deliberately choose to aim off to either the left or right of the hut then, upon reaching the stream, you will immediately know in which direction the hut lies. It will be either up or downstream depending on which way you purposefully aimed off.
Now, on the other hand, if you tried to "spear" the hut (to aim straight for it) you may miss it by, say, a mere hundred metres even after much careful navigation, especially if the hut is well hidden by bushes. You would arrive at the stream and not know which way to turn. Chances are you would have to search both up and downstream before finding it. You would also not know exactly how far to search, adding further to your stress. Using the aiming-off technique, you know exactly which way to turn upon reaching the stream and, even though the exact distance to travel along the stream may still not be known precisely, you are no longer under the stress of thinking that perhaps you turned the wrong way.
7. Beware of parallel features. Parallel feature errors can be made in a landscape with lots of similar features. You may have to cross many parallel ridges and, if you miscount the number or interpret the map incorrectly, you may find yourself on the wrong ridge and not know whether you have gone too far or not far enough. This can easily happen if, in the fine detail of the map, one of the ridges does not even show up!
The same can happen for streams and even tracks. Hopefully you will realise your error early when features no longer agree with what is expected. It is then a matter of sitting down and carefully figuring out exactly where you may be by observing the surrounding features then deciding whether to backtrack or carry on to the next similar feature.
8. Do not underestimate the value of pace counting. It is especially useful in avoiding parallel errors. It is a way of introducing a degree of objectivity into the otherwise subjective art of gauging distance which normally amounts to simply guessing. Although your gait may vary with the type of terrain (vegetation and slope), it is better than having no guide at all and over short distances (up to one or two kilometres) can be surprisingly accurate. It is a matter of measuring your stride beforehand over a measured distance and also having some idea how this will vary with changing slopes, vegetation and with pack weight.
9. Route choice should be made by taking the grain of the terrain into account. Note which way the streams are flowing or the ridges falling. Keep in mind that if you intend to ascend a watercourse you will have to make continual decisions on route choice each time you arrive at a branch. If, on the other hand, you choose to ascend via a ridge, no decision is necessary as all ridges converge towards a summit as you ascend. The opposite is applicable on the descent. This is one reason why ascending a mountain via a ridge and descending it via a creek makes good navigational sense.
If the route lies across several ravines or deep gullies, it is often less tiring and quicker to detour above them in their catchment area or, even higher, by following the ridge forming the watershed. The best route choice becomes a toss-up between the extra energy required to climb high above the gullies and the difficulty in descending into and out of the gullies. Without gullies, there is still the choice of whether to traverse the slope below a peak at one level (this is called contouring) or ascend to the peak and down the next ridge. Certainly staying on the tops of ridges makes for easier movement but the extra altitude gain can be tiring. Contouring across a slope will be less tiring but steep slopes are awkward and slow to cross. The choice is yours.
As a check on your navigation in complex terrain, always note from the map’s contours whether you should be ascending or descending. This check is an additional safeguard against faulty map and compass work.
10. In a whiteout, where mist and snow combine to produce a white void, following contours is often your only means of accurate travel. If your destination is linked to your present position by a contour line, it is often feasible to follow this line as long as the terrain along it is negotiable. The difficulty with this contouring technique is to stay accurately on one level and not gradually ascend or descend. Another often more sure technique for navigation in a white out is to follow line features such as spurs, stream beds or valleys.
11. If you intend to go back the same way you came, it makes good sense to look back occasionally to become familiar with the look of the land in the reverse direction. This is particularly important at spots where you consider there may be a problem in making a route choice when approaching the spot in the reverse direction. As mentioned previously, this problem will arise when ascending or descending ridges and creeks. With each of these, problems with route choice change dramatically when you reverse your direction.
12. Observe the cell you are currently in and note when you move from one cell to the next. A cell refers to the natural enclosure you are currently in. It is a natural field with virtual fences made from creeks, ridges, tracks, roads or even real fences. For example, a cell may consist of the region between two creeks, which finally converge and join, and the ridge forming the watershed across the headwaters of the creeks. This triangle is a natural field or cell. While you do not cross a creek or ridge you can safely say you are still in this cell. In other words, you know roughly where you are. Once you cross one of the boundaries (one of the creeks or the watershed), you have moved from this cell into another one with new boundaries and possibly new types of boundaries. By identifying each cell, you can track your movement across a map via a series of cells and by keeping aware of your current cell, you maintain your orientation in broad terms. It is difficult to become totally lost if you can identify your current cell at any time.
13. Hold the map and compass efficiently. Attach the compass with a short strap to your wrist and carry the map in the same hand all the time. This arrangement is far better than carrying the compass around your neck from where it is nearly impossible to place it comfortably on the map. Try to hold the map so that your thumb is on or near the spot identifying your present location and the orientation of the map aligns with the real surrounding features. You can then easily look at the map at anytime and quickly locate your position on it. With the map orientated to the surroundings you are simultaneously walking into the landscape as well as walking into the map. Place the map in a sealed plastic bag or laminate it to avoid deterioration from sweat or rain.
14. Before setting out, observe the larger or more significant terrain features on the map in the region you intend to visit. Devise an escape route in case something should go wrong or you get lost. Maybe there is a road or track which traverses the entire region to which you could head on a very basic compass bearing from almost any part of the map. Failing this, does it make sense to ascend or descend to safe ground? Knowing which way to go towards safety in a very broad sense can almost totally assure you that you will never get completely lost. It will also reduce the need for the involvement of rescue groups and other embarrassments.
15. Error recovery is something you will need to do often. On nearly any leg, you will become slightly disoriented at some stage. How you handle this will dictate either a successful outcome or an embarrassing failure. An entire article could be written on this topic alone. Essentially, every situation is different and experience is often your best asset. Experience in error recovery comes with making many mistakes in the past. From these, you begin to learn methods of re-orientating yourself. Essentially the skill involves firstly recognising that you are not where you think you should be because, simply, the surrounding features no longer align with those on the map.
What you do next is critical in either saving the situation or compounding the problem. The aim is to once again identify the features around you so that you can pinpoint your exact position on the map. You can do this by standing still and trying to piece the terrain together, by backtracking to a previous identifiable feature or by pressing on in the hope you will come to a new identifiable feature which will sort out the problem The choice is yours. Every situation is different and requires a different recovery method. Remember, this is probably the most important navigational skill you will learn. And you will need to use it from day one of your navigational training and on every subsequent day. Even experts get disorientated momentarily on nearly every trip. It is quite normal. The ability to realise you have a problem early, when it can still be fixed, is the sign of a true expert. And remember, realising you are lost, even at a micro-level, can be very stressful. Essentially, stay calm and don’t panic. Good luck!

Tuesday, July 19, 2011

Scouting For Acorns


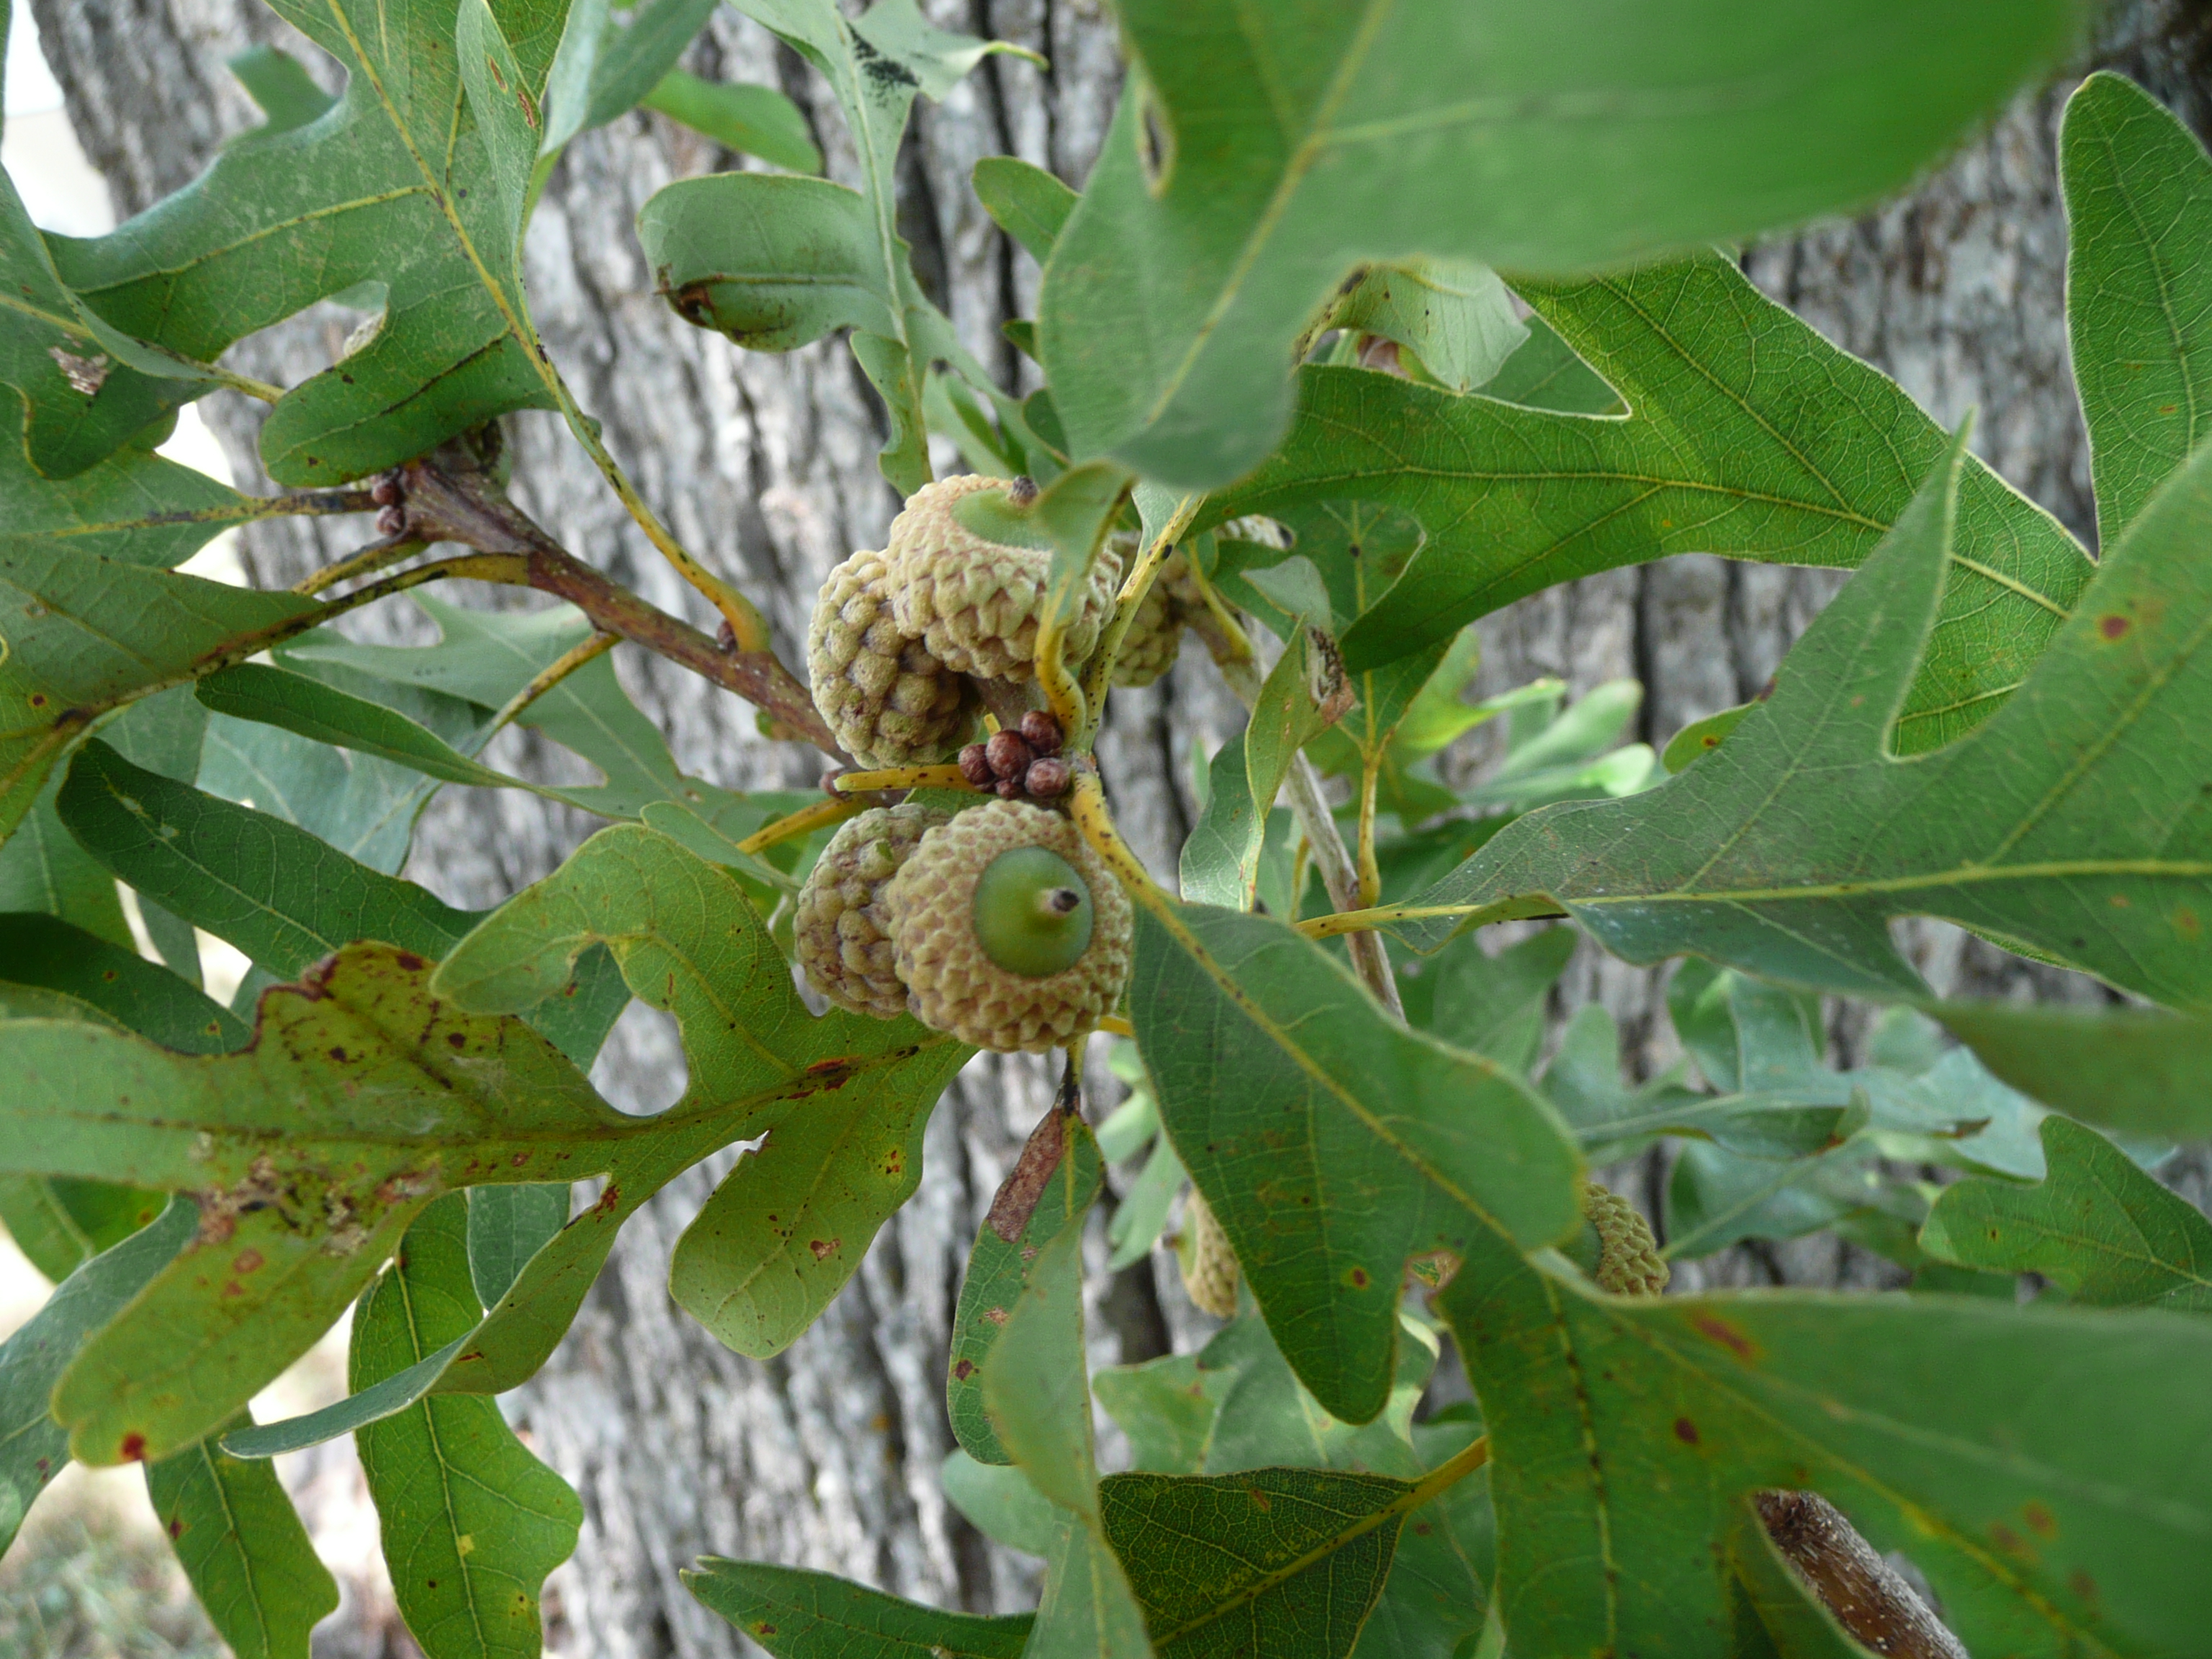
Scouting for acorns is a good technique whether you hunt 40 or 4,000 acres.  Ideal deer hunting can occur when oak trees are few and far between.  This usually occurs when agriculture or other land use practices limit the amount of habitat that is forested.  Another situation that produces great hunting is when only a few oaks in an area produce acorns.  When these conditions exist, patterning deer may be as simple as loAcorns, Oak Acorns, Deer Hunting Tipcating the trees that produced acorns and hunting near them without spooking deer.
However, if oaks are common where you hunt, it can be extremely difficult to see deer during years when all the oak trees produce acorns.  This is because deer can eat and bed within an extremely small area.  Hunters simply can’t approach these areas without alerting deer!  It’s tough to get between the feeding and bedding area when they are literally just a few yards apart.
One nice characteristic of acorns is that they take months to develop. Therefore hunters can scout and place stands during July and August, well before deer season, with confidence that acorns will be present at the same location during hunting season. Knowing which types of acorns deer prefer during the early (from the white oak family) versus late (from the red oak family) season can be a key to hanging stands in locations that fit your hunting schedule.  I hope you get some time to scout for acorns soon.  Limit disturbance during deer season by scouting and hanging stands now!